

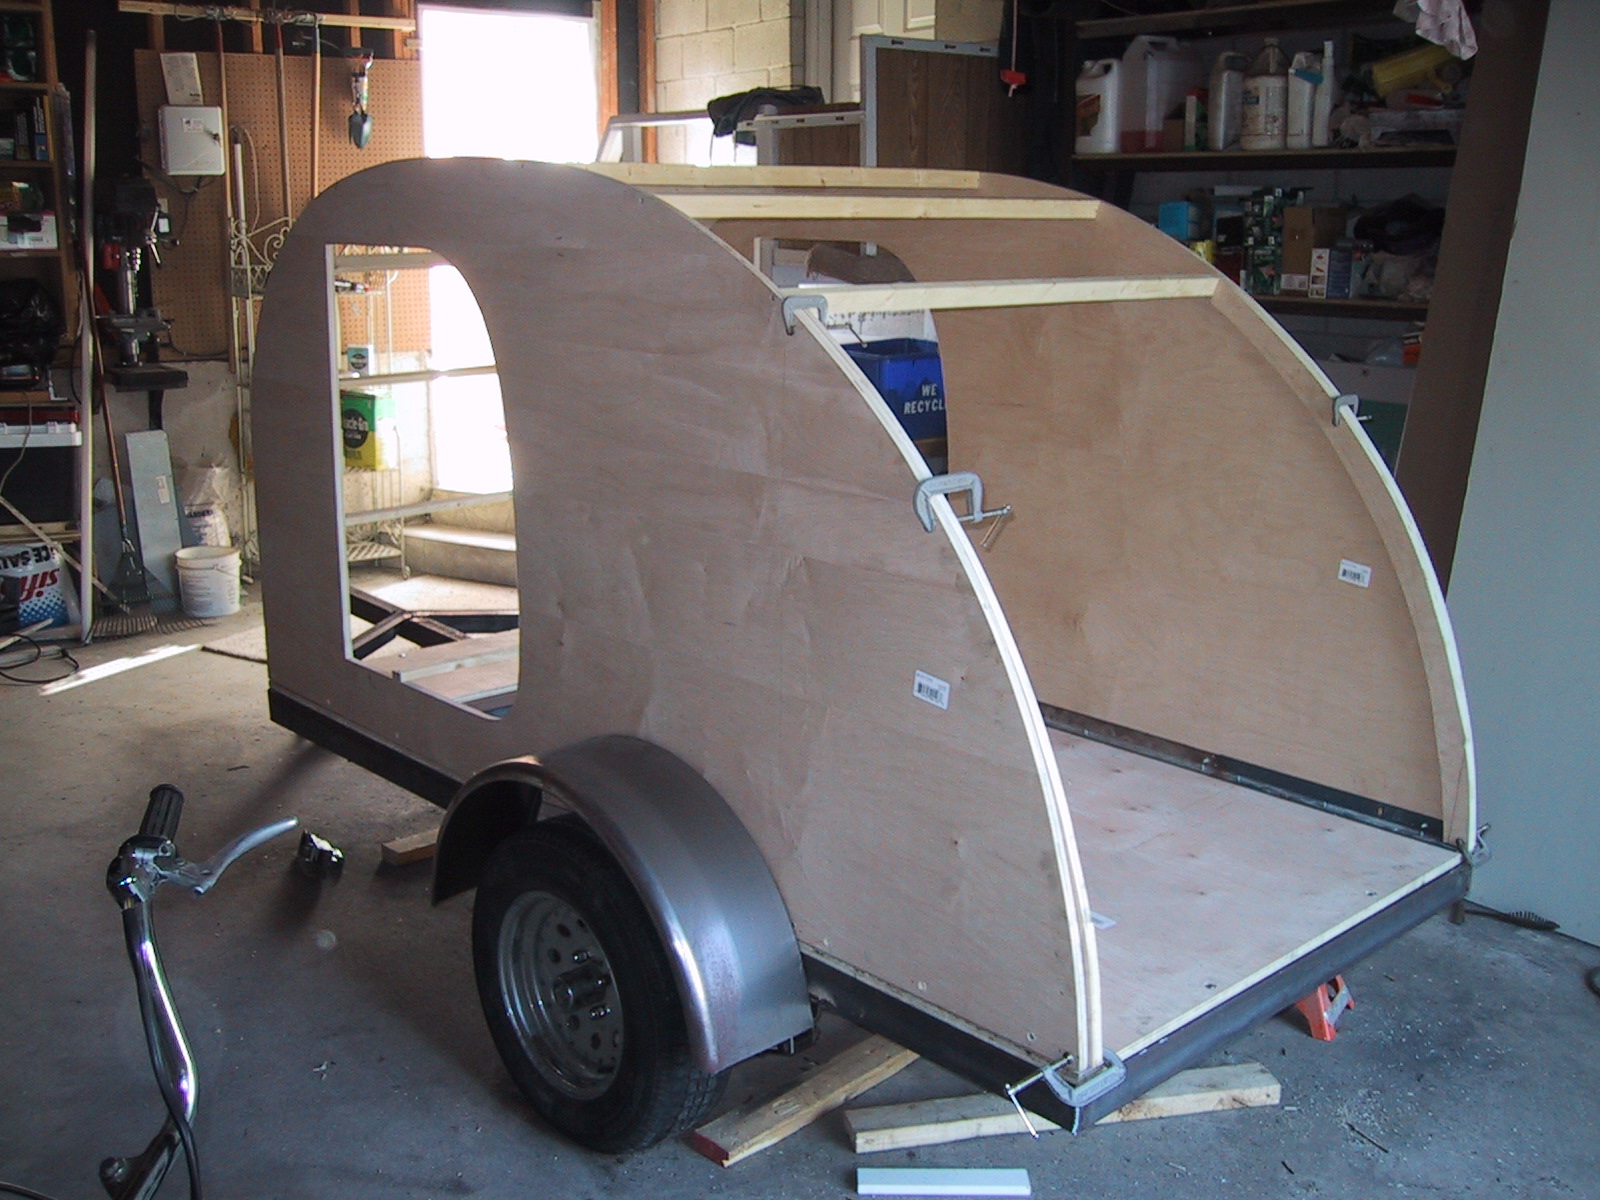
Once I had my basic shape on paper it was pretty easy to lay it down on the plywood and get it transferred to the wood. I wasn't terribly worried accuracy because I knew i was going to be jigsawing it out and belt-sanding it down to a more solid clean shape after. Once I got the first side of the trailer cut to shape I used it as a stencil to cut the 2nd wall, then its just a matter of C-clamping them together so you can belt sand both sides of the trailer simultaneously and keeping them exactly the same. The sanding process wasn't too long when you have a belt sander, I'd say it took maybe 20 minutes tops.
 Once I had both walls sanded to where i wanted them I figured I might as well sketch out where i thought the door should go. It was pretty rough, and as you can see in my 3rd image here I initially made it a little small at first, so i just moved it down a little extra to be level with what i expected my mattress height would be.

The ribbing of the roof was next which was made up of 2x1's which were strong enough to stabilize everything and yet small enough to save precious interior cabin space.
 I have to tell you how incredible bed framing was for this project, its incredibly plentiful and cheap. If you ever see anyone throwing away old beds at their curb I highly recommend grabbing the framing. Even though we did purchase special steel for building the actual trailer frame itself, we did use a ton of scrap bed framing for many parts of this trailer.
I propped up my old Chevy Chevette rims up to the outside of the cabin just to visualize how it was gonna look eventually. I had long scrapped my beloved Chevette maybe 7 years before this project began but I had kept the old wheels and this was the perfect project to use them for.


 |
| There I am in the old garage.. good times. |

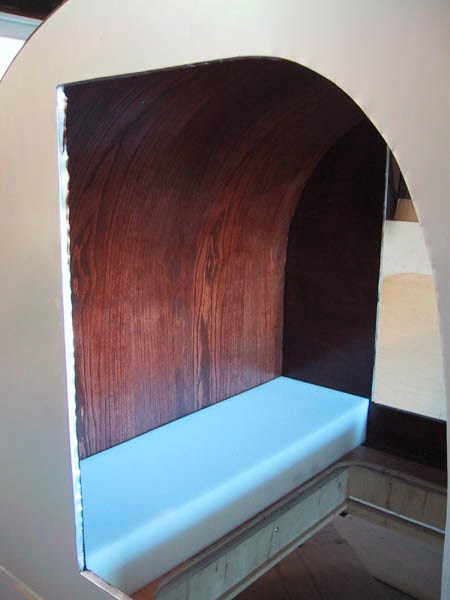
I had decided early on that I wanted to modify your average teardrop plan by adding a transformable table inside the cabin that would allow you to convert the bed into benches and have your feet hang down a trap door area in the event of a major camping storm and you wanted to eat or play cards or whatever inside while it pours outside.
This is why you can see this rectangular framing happening here. This was the portion of the cabin we had designated as the trap door, the wood flooring in this area would lift up and act as the table itelf mounted by an adjustable pole.
 |
You'll notice the trap door area is using
bed framing which looks different from
the purchased steel.
|
I did luck out however, as I discovered that Toyota Tercels seemed to be the very last era of cars that had a single solid 1 piece axel that still had the matching bolt pattern that was on my Chevette. I ended up miraculously finding a few junkyards that actually still had early 90's Toyota Tercel parts (which i wouldn't have believed in 2004) but we managed to score a complete axel from a scrap yard in Milton.
Some of you might be wondering why I didn't try and find a Chevette axel to begin with, since the wheels came of a Chevette... well firstly at the time 1980s era Chevette's were very much extinct, but secondly the Chevette was a rear wheel drive vehicle believe it or not so they didn't have the kind of rear axel that would have worked anyways.. Thank you Toyota you saved this project.
 |
| A closer look at the Tercel Axel and springs. |

Putting the cabin in place allowed us to mark and cut the trap door out of the floor and allow us to visualize how it was gonna fit and feel. Here you can see Cat and I checking out the vibe.

 |
The wheel well is only propped up to give the
illusion of being installed.
|
In the picture to the left you can see that we started it by cutting two thin pieces of plywood at the same curve as the side walls and the approximate thickness of what your finished door will be.. I'd think our door was close to 2 inches thick. We used C-clamps to hold the pieces in place so i could belt sand them flush with the side walls.

We left the door in its current state when the ribbing was finished and decided to focus on installing the interior 1/8th inch ceiling material which was a super thin flexible wood easily purchased at any home depot in the same 4x8 sheets they sell everything else at.
 |
| Just before installing the interior ceiling |
 |
| Here we see the interior roofing material installed. |


 The next phase of the build was getting started on covering the outside of the trailer with metal, the vast majority of teardrops you see online are sort of airstream looking aluminum pods which is what attracts most people too them i'm sure. The metal was probably one of the first problems I had to investigate even before thinking about tackling this project because if the metal was crazy expensive then there wouldn't really be any sense in trying to pull this project off.
This is where working in the print industry at the time paid off. I was working for a pre-press film house at the time as a photo retoucher and I got to thinking that old used press plates might be a cheap way to cover the trailer. Press plates are used in the printing process for many things and what usually happens is that advertisements for say a bus shelter are etched onto thin aluminum plates that are pretty big which act as a stamp of sorts when ink is placed on them which then transfers onto paper (its more technical then that really, but i'll just leave it at that for now). Typically press plates are matt finished on one side after they've been etched but the back side of them is perfectly clean shiny aluminum, now; after a press plate is used for its intended print run they are generally piled up in a corner of a printing shop and then eventually picked up to be recycled for future re-use.

Now because our sheets were slightly smaller than 4 x 8 we had a seam to contend with that we wanted to keep water tight. One full sheet of this metal only covered about 75% of the full side length of 8 feet, so we had to create a fold that the two sheets folded into each other that we screwed down tight onto the wood. This was the end result of covering our first side.
Once we had a handle on what adhering the metal was gonna be like, we decided to move onwards with priming and painting the trailer frame since that process was going to take up a good portion of the garage. There was still lots to do with the cabin in its current state such as running electrical wires up the roof through the ribbing for lights and solar panels etc and we could accomplish that stuff quickly while the frame was drying.

We had to rig up an A frame support out of 2x4's that we could hang the frame from to make painting all sides of it easy. It didn't take too much time, but definitely not stuff you consider as part of the process of building something like this.

I primed it using a few home depot spray cans but decided it was best to paint it silver with a proper air compressor mix of paint, since you can cover more ground quicker. Painting is always one of the most satisfying parts of these jobs for me since in a very short period of time you can see such drastic results.


The cables were fed directly through the ribbing in the roof which only required some small drilling, I just used thin gauge speaker wire to power the dome lights.
Once I had my cables in place it was time to insulate! I decided to use styrofoam for insulation which was cheap and easy to cut and work with and so piece by piece ribbing by ribbing we inserted our styrofoam slices into each compartment
In my initial plans I had imagined building a special heating area under the galley kitchen where i could have a bucket that I could toss hot rocks into that had been sitting in the camp fire for a while, and have a vent that would lead into the sleeping area, this never really came to fruition though and was ultimately left on the design room floor.
 Insulation was in place, everything was snug; it was time to close up the roof and for that we decided to use masonite.. now some of you might be wondering why on earth would you choose such a crappy piece of fake wood for something as important as the roof of your trailer? well let me tell you, i don't know why either because it was it wasn't easy to install..
You can see in the 2nd picture where we brought the electrical cables out from within the cabin roof in preparation for where our utility box was going to reside.

The 3rd image gives you a better idea of what happens with our standard 4x8 sheets of roofing materials when we install them, it ends up leaving us about a foot short from making it to the galley door seam where the roof would end, thus; in each case we would have to create a small one foot patch on both the inside and the outside to complete the shell. Not a huge deal, but still I ended up having a bit of a warping seam on the inside of the trailer on the ceiling at that area above the cupboards.. it took a couple years mind you, but it happened none the less.

Just a liberal amount of contact cement and laid it down on top of the masonite ensuring to leave an even amount of overhang on both sides. I'll discuss the overhang in the next post. Once the aluminum roof was secure and dry I drilled a starter hole in the vent hole as well as in the two pockets where the solar panels were to be placed, then used metal cutting shears to cut the holes out completely as I had done with the side doors before the masonite went on.

We were now ready to permanently mount the top vent, this was something i wanted to be super diligent about because this was one of the major items in the roof that could potentially lead to future leaks if it wasn't done properly.
 |
| You can see how rough my cuts were in the aluminum for the solar panels |


 Once I had the entire length of the trailers roof overlap cut into pieces it was just a matter of trimming each cut a little bit further so that none of the small pieces overlapped each other when folded in the steeper curved areas near the front end of the cabin.

 I'm going to take a second here and speak from the perspective of someone who used the trailer for a couple years and explain what happened with this door and why you see a steel bracing shown in the first photo in one of the top most wood compartments. Essentially over time the hydraulic arm that raised and lowered the door started to strip from its mount on the door itself, there was so much tension and pressure on the door being held upright and so much weight from the door all focused onto such a small area that we realized that we had reinforce the inner area with steel in order to secure the hydraulic arm to withstand the amount of pressure the door was constantly under.


In total we did 3 to 4 coats to reach the desired darkness we were looking for. We didnt' really leave much drying time since by the time we'd finish a single coat it was long enough for us to come around and start at the beginning again.


The foam was a very nice fit and everything was coming together pretty well. My mother in-law helped us out by sewing us covers for the foam that just zippered on and they really turned out great. We ended up having just enough room to fit a water tank and a decent size cooler into the back galley area under what would soon become our kitchen counter.

the Solar panels I used for this project were by todays standards quite low powered coming in at a whopping 5 watts each giving me 10 watts charging power, but at the time they weren't incredibly cheap either. I would probably put like 40 watts these days, but regardless, it was neat to have. Installing them into the roof was pretty straight forward as I had pre-measured and built the pockets to be pretty snug when the panels slipped in. I had them intentionally raised above the roofline just so there'd be no risk of water pooling etc during rain storms, and I used some heavy duty black silicone to seal them into place.
Overall I'd say the panels were a great addition, but as mentioned earlier the more wattage you can give the better. I did many tests over the couple years i tripped with this teardrop and I typically found that 10 watts of charging power usually only gave me like 10 extra minutes of interior light power, so on a day-to-day basis it really doesn't help you much but where they really helped was when you left the trailer for a few weeks in-between trips. I was leaving this trailer in an open field when not in use so it was always exposed to plenty of sunlight so battery maintenance was great, just don't expect panels of this caliber to help you top-up a dead battery over the course of one sunny day on a long trip.


No comments:
Post a Comment